VCSA configuration backup
This guide will show you how to configure and backup the VCSA configuration.
While you can do a direct VM backup like any other system, backing up the configuration separately can be a quick way to undo a change made in error or restoring back to an unhappy, but still operational VCSA, without having to restore the whole VM. Restoring a full VM, while possible, comes with it's own challenges, the primary one being, you are likely backing up VMs by using VCSA as your connection point - so restoring this VM would be impossible without adding a host to your backup product and restoring back to that first.
First of all, to backup the configuration, you must have permissions to one of the following, HTTP/HTTPS, FTP/FTPS, SFTP, NFS of SMB (CIFS), in this guide I will be using SMB. I will not document how to grant permissions on a share or server, so please do that first if you've not already done so.

This guide is based on VCSA version 8.x but will be similar for those of you on 7.x.
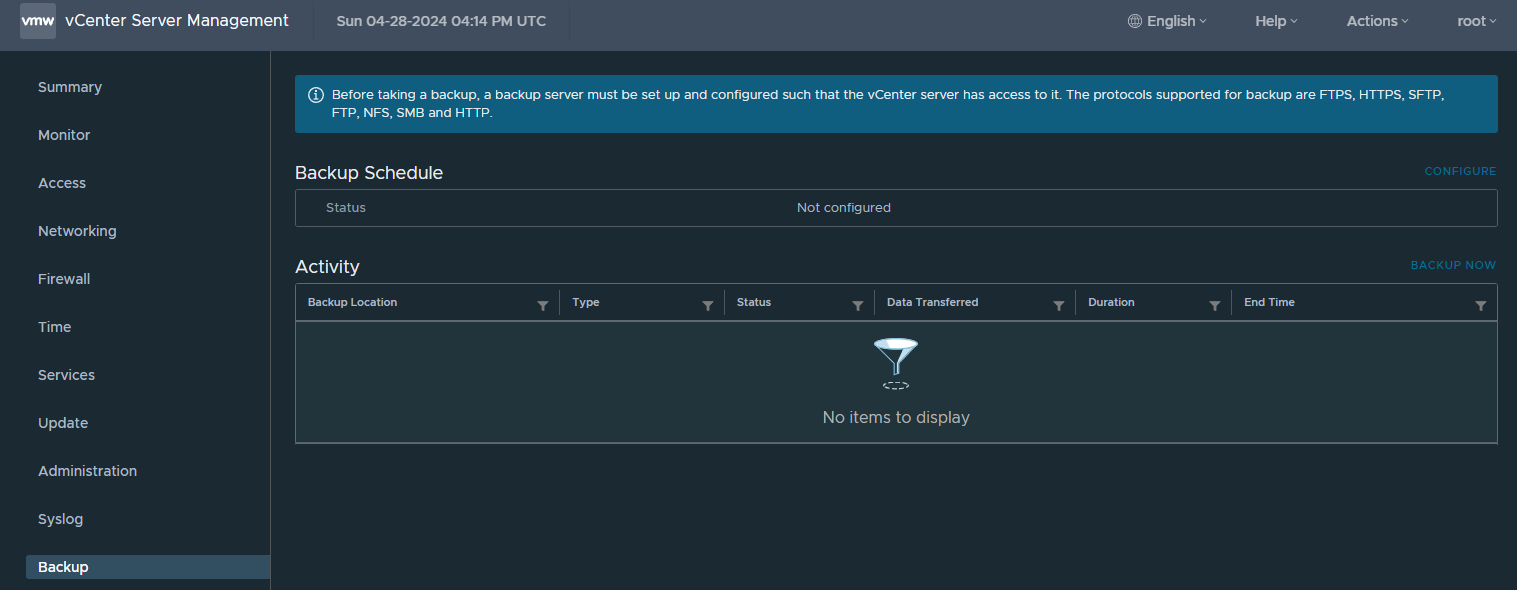
By default this is not configured, so you'll see a similar screenshot to above, once you have your share setup with permissions to allow the system to backup your configuration, click the configure button.

You will be presented with the configuration window, above, as you can see I have populated mine with the location - you will likely use DNS names, but in this example, and since it's my lab, I will be using IPs. The backup location must be the full path and is case sensitive.
You will be prompted for backup location, backup destination credentials, the schedule you wish to run this on and number of backups to retain. By default this is set to keep all backups, configure this as per your preference - the estimated backup size based on your options will be listed - this is per backup, so if you keep 7 days, you will need 7x the total size (compressed).
You do not have to encrypt your backup, however this will add security to your configuration and is especially worthwhile if you are saving this to a non-encrypted location or a shared path where other people may have access.
Once created, you will see an overview of the schedule, initially the history will be empty until the backups start to populate.

In my example I ran a manual backup to confirm the location and credentials work as intended, you can see this in the activity window, expand the backup using the > icon, when restoring you can only restore to the same VCSA version as the backup, so note the backup version before doing any restores.
Clicking the little 'i' symbol will note this. Versions must be identical.
That's it, you now have your configuration setup to backup as per your schedule. If your backup fails, check your permissions on the destination folder, confirm your path for upper and lowercase (as noted above this is case sensitive), and confirm there is sufficient space.